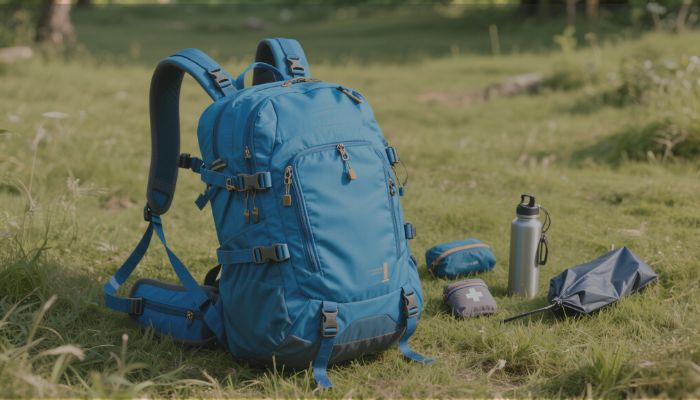
When it comes to day hiking, less is more—but only if your backpack works for you, not against you. The wrong backpack can turn a refreshing nature walk into a shoulder-aching ordeal. But the right one? It feels like you’re carrying nothing at all.
With thousands of options on the market, how do you pick one that balances storage, weight, comfort, and functionality? In this guide, we’ll walk you through five crucial factors you need to consider when choosing the perfect daypack for hiking.
✅ Section 1: Ideal Capacity — Why 15L to 25L Is the Goldilocks Zone
Choosing the right capacity for a day hike backpack is the first—and arguably most crucial—step. If you go too small, you’ll end up cramming your gear or sacrificing essentials. If you go too large, you’ll be tempted to overpack, making the hike unnecessarily strenuous. So what’s the perfect size? For most day hikes, the sweet spot lies between 15 to 25 liters.
Why Size Matters
When hiking, every gram counts. An oversized bag not only adds weight but also shifts your center of gravity, affecting balance and causing fatigue. Meanwhile, a well-sized backpack ensures you carry just what you need and nothing more.
What Do You Need for a Day Hike?
Let’s break it down:
-
Hydration: 1.5 to 3 liters of water, either in a bottle or hydration bladder
-
Food & snacks: Sandwiches, trail mix, fruit
-
Weather protection: Lightweight rain jacket or windbreaker
-
Safety gear: First aid kit, whistle, flashlight
-
Navigation tools: Map, compass, GPS device or phone
-
Other items: Sunscreen, bug spray, hat, gloves
All of this fits comfortably within a 20L pack, with room to spare if packed efficiently.
Matching Pack Size to Hike Type
| Hike Type | Recommended Capacity |
|---|---|
| Short urban trail (3–5 km) | 10–15L |
| Moderate nature hike (5–15 km) | 18–22L |
| Day hike with extra gear (photography, kids) | 22–30L |
Always consider your unique needs. Photographers might need more space for lenses. Parents may pack extra water and snacks. Still, going over 30L for a single-day outing is rarely necessary.
Don’t Forget Fit
Capacity isn’t just about liters. The fit matters just as much. Look for adjustable straps, gender-specific models, and padded back panels. When a backpack fits right, it feels lighter—even when it isn’t.
✅ Section 2: Smart Compartment Layout — Organize Like a Pro
Now that you’ve chosen the right size, the next step is ensuring everything inside your backpack has a place. Why? Because during a hike, especially in unpredictable weather, you don’t want to dig around for five minutes just to find sunscreen or a snack.
The Pitfalls of a Poor Layout
A backpack with only one large main compartment often results in items shifting during movement. Worse, it forces you to empty everything when you need just one thing.
Must-Have Compartments
-
Main Compartment
This is where your bulkier items go—jackets, lunch, and your hydration bladder if applicable. -
Secondary Compartments
These smaller areas are perfect for items you need more often: sunscreen, insect repellent, or a compact camera. -
Side Pockets
Mesh or zippered, these are ideal for water bottles and protein bars. -
Front “Shove-it” Pocket
Great for quickly stashing your rain jacket or map. Look for elastic or clip-secured models. -
Internal Security Pocket
Keep your keys, ID, cash, and phone here. Some even have RFID protection. -
Hydration Sleeve + Tube Port
Hydration is essential. Packs with a built-in hydration system slot and hose port make drinking on the go seamless.
Tips for Packing Efficiently
-
Put heavy items close to your spine, mid-height in the pack
-
Use compression straps to stabilize your load
-
Roll clothing instead of folding—saves space
-
Group similar items in pouches or zip locks for easier access
Remember: An organized pack doesn’t just look neat—it saves time, reduces stress, and minimizes unnecessary unpacking on the trail.
✅ Section 3: The Carry System — Comfort Isn’t Optional
When most people buy a backpack, they check the size, maybe the color—but overlook the carry system. That’s a huge mistake. The straps, back panel, and support system determine how your pack feels on your body.
What Is a Carry System?
It includes:
-
Shoulder straps
-
Hip belt
-
Chest strap
-
Back panel (sometimes framed or padded)
-
Load-lifter straps (on more technical packs)
These components work together to evenly distribute weight across your back, hips, and shoulders.
Key Features to Look For
-
Adjustable shoulder straps: Ensures proper torso length and positioning
-
Ventilated back panels: Mesh or foam structures allow airflow and reduce sweat buildup
-
Padded hip belts: Crucial for heavier loads (5kg+), especially during long hikes
-
Load lifters: Pulls the backpack closer to your back for better balance
Fitting Tips
When trying on a pack:
-
Adjust the torso length (if available).
-
Tighten the hip belt first—it should sit on your hip bones, not your waist.
-
Then, adjust the shoulder straps.
-
Finally, secure the chest strap.
A backpack that fits well feels lighter, more stable, and doesn’t chafe—even on uneven terrain.
Bonus: Women’s and Men’s Fits
Many brands now offer gender-specific designs. Women’s packs typically feature:
-
Shorter torso length
-
S-shaped shoulder straps
-
Wider hip belts
These differences enhance comfort and reduce strain on shoulders and lower backs.
✅ Section 4: Materials & Weather Resistance — Don’t Let Rain Ruin Your Hike
Hiking means being outdoors. And nature doesn’t always cooperate. That’s why your daypack needs to handle wind, rain, and sun without falling apart.
Best Materials for Durability
-
Nylon: Strong, water-resistant, and abrasion-resistant.
-
Ripstop fabric: Reinforced weaving prevents small tears from spreading.
-
Polyester: Slightly less durable but usually more affordable.
Look for PU (polyurethane) coatings or DWR (durable water-repellent) treatments on the exterior.
Water-Resistant vs. Waterproof
-
Water-resistant = Protects against light rain or splashes
-
Waterproof = Can be fully submerged or endure heavy rain (usually with roll-top closures)
Most daypacks are water-resistant. If you’re hiking in wet climates, choose a model with:
-
Taped or sealed zippers
-
Integrated or stowable rain cover
-
Water-resistant fabric coating
Ventilation Is Equally Important
Look for mesh back panels and vent channels to reduce sweating. A sweaty back isn’t just uncomfortable—it leads to odor, damp gear, and skin irritation.
Hot Tip: Use a separate dry bag inside your backpack to protect electronics, even in a water-resistant pack.
✅ Section 5: Game-Changing Extras — Little Features That Add Big Value
While core features matter most, sometimes it’s the small, thoughtful details that elevate a backpack from “just fine” to “absolutely perfect.”
What Features Are Worth Paying For?
-
Hydration system compatibility
-
Trekking pole attachments
-
Helmet loop (for bikers)
-
Integrated whistle in the sternum strap
-
Stretchy gear loops
-
External bungee cords for jackets or sandals
Safety Add-Ons
If you hike early in the morning or late in the day, reflective details are a must. In remote areas, built-in emergency whistles or slots for personal locator beacons can add peace of mind.
Built-In Rain Cover
Many mid-range packs now include an integrated rain cover. It’s usually stored in a zippered compartment at the bottom and can be deployed in seconds.
Compression Straps
These side straps help cinch down your load, improve stability, and even hold trekking poles or tripods.
✅ Conclusion: A Smart Backpack Makes Every Hike Better
The best day hiking backpack isn’t just a container—it’s your most loyal trail companion. When chosen wisely, it supports you, protects your gear, and disappears into the background as you enjoy nature.
Recap Checklist:
-
✅ Choose the right capacity (15–25L for most hikes)
-
✅ Look for smart compartments and hydration compatibility
-
✅ Invest in a proper carry system with good ventilation
-
✅ Don’t skimp on water resistance
-
✅ Appreciate the “small features” that improve your trail experience
Final Word:
Always try on your backpack fully loaded before your hike. Practice adjusting straps and accessing gear. Your future hiking self will thank you for it.


